Tips and tricks
Plasmo > Tips and Tricks > How to build a plastic model (3) - Starting model constructionHow to build a plastic model (3)
Starting the construction
Difficulty: 
Before starting model construction, examine the kit and study the plans very carefully. This procedure will serve two purposes. First, you will check that all parts have been supplied in the plastic kit as listed. And second, and you will get and idea, how the model will be assembled from individual parts. Following the construction guide, you need to realize which activities must precede the others.
It is also suggested that all small fittings and hardware be sorted into small boxes to avoid loss during the building process.
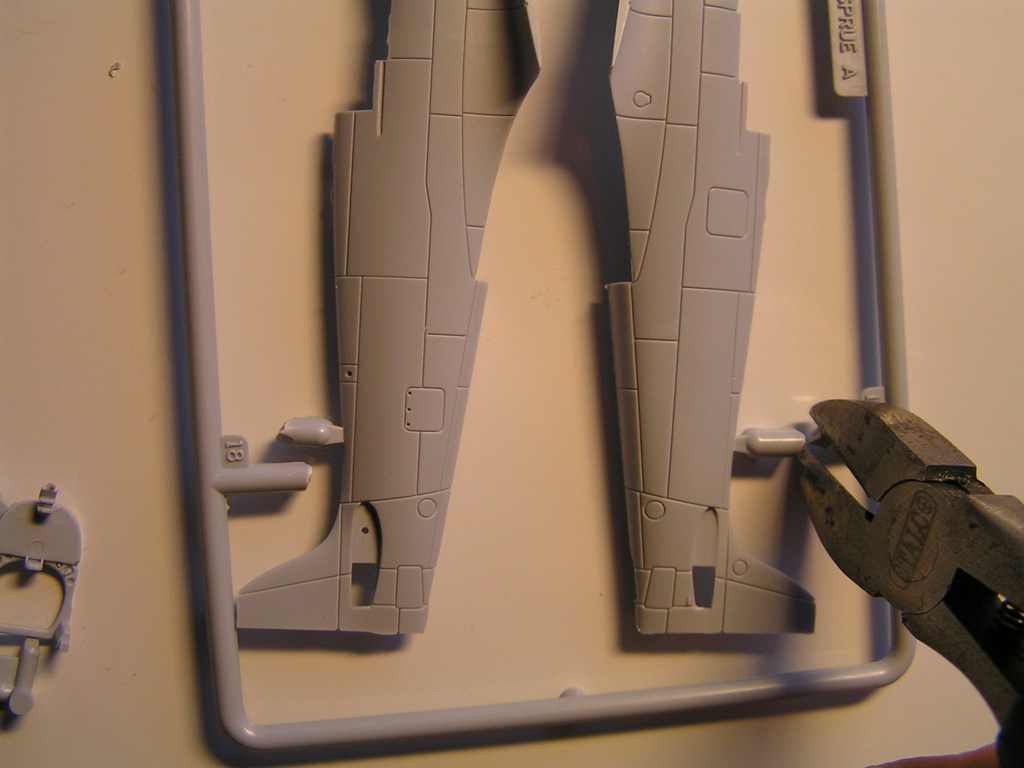
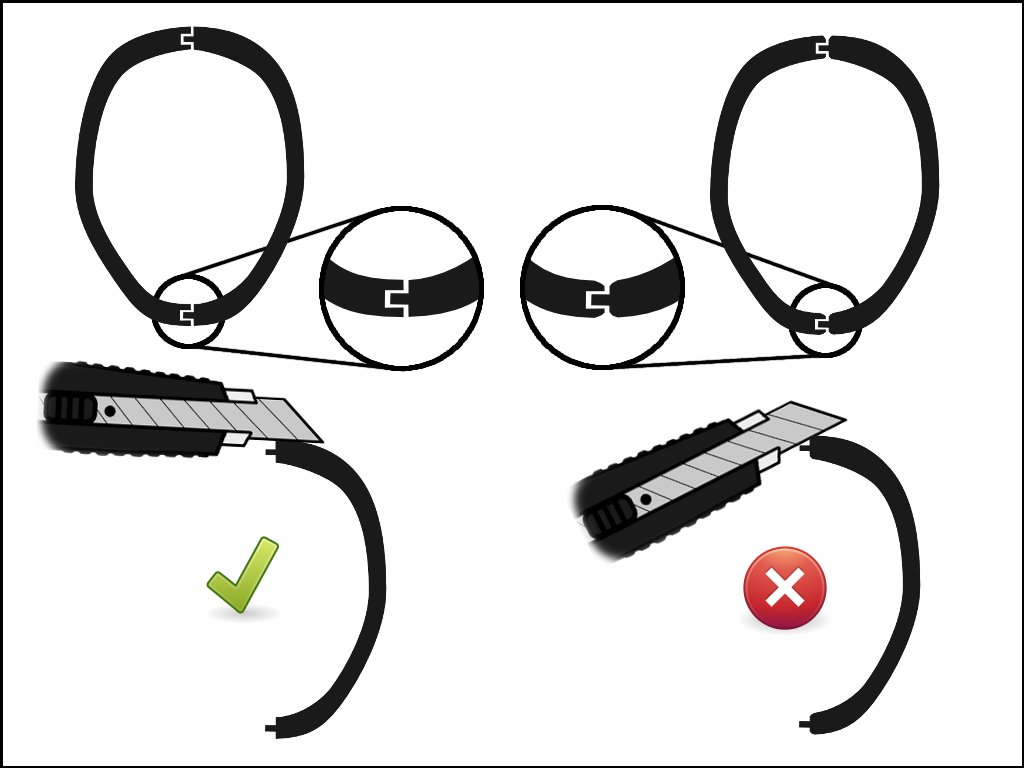
Cutting off parts
If we have an aircraft model then we traditionally start with building the cockpit. The cockpit in this sample kit consists of seven parts. First, we have to separate the parts from the molding tree with splitters. We do not cut off the part just next to it, because we could damage it, and so we have to add little correction. Suitable distance is about 0.1 inch (3 mm). Now we put splitters aside and break-off blade knife comes next. Cut off surpassing pieces, but again let a little extra space, because we might accidentally cut into the part of model, which of course we do not want.

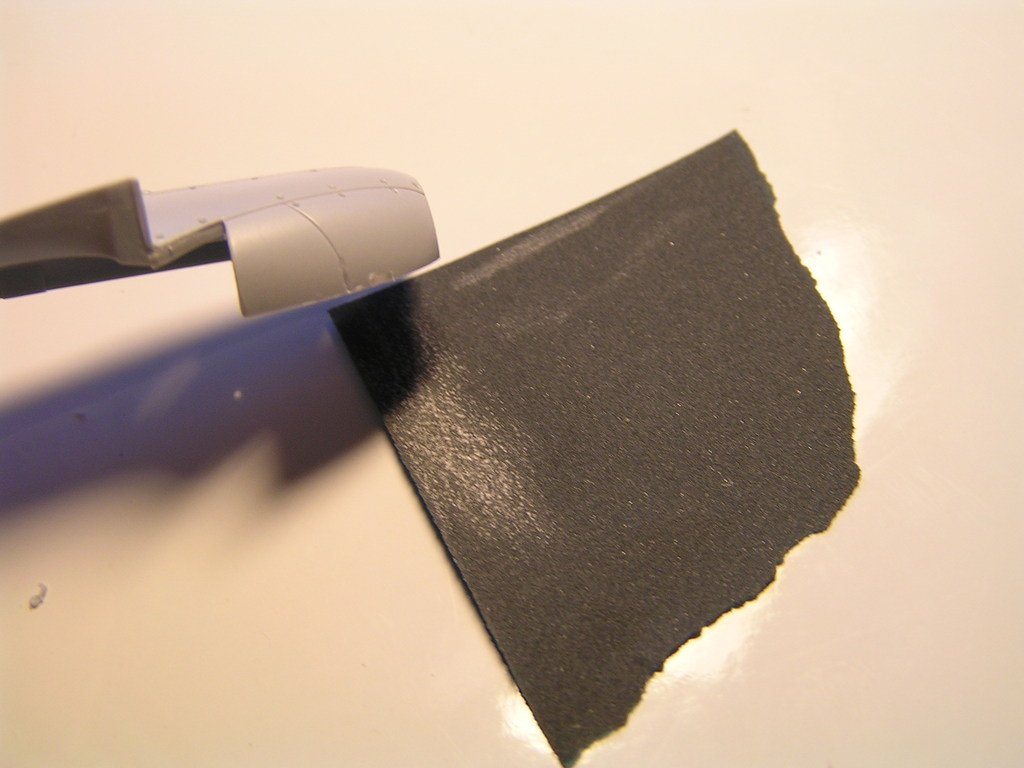
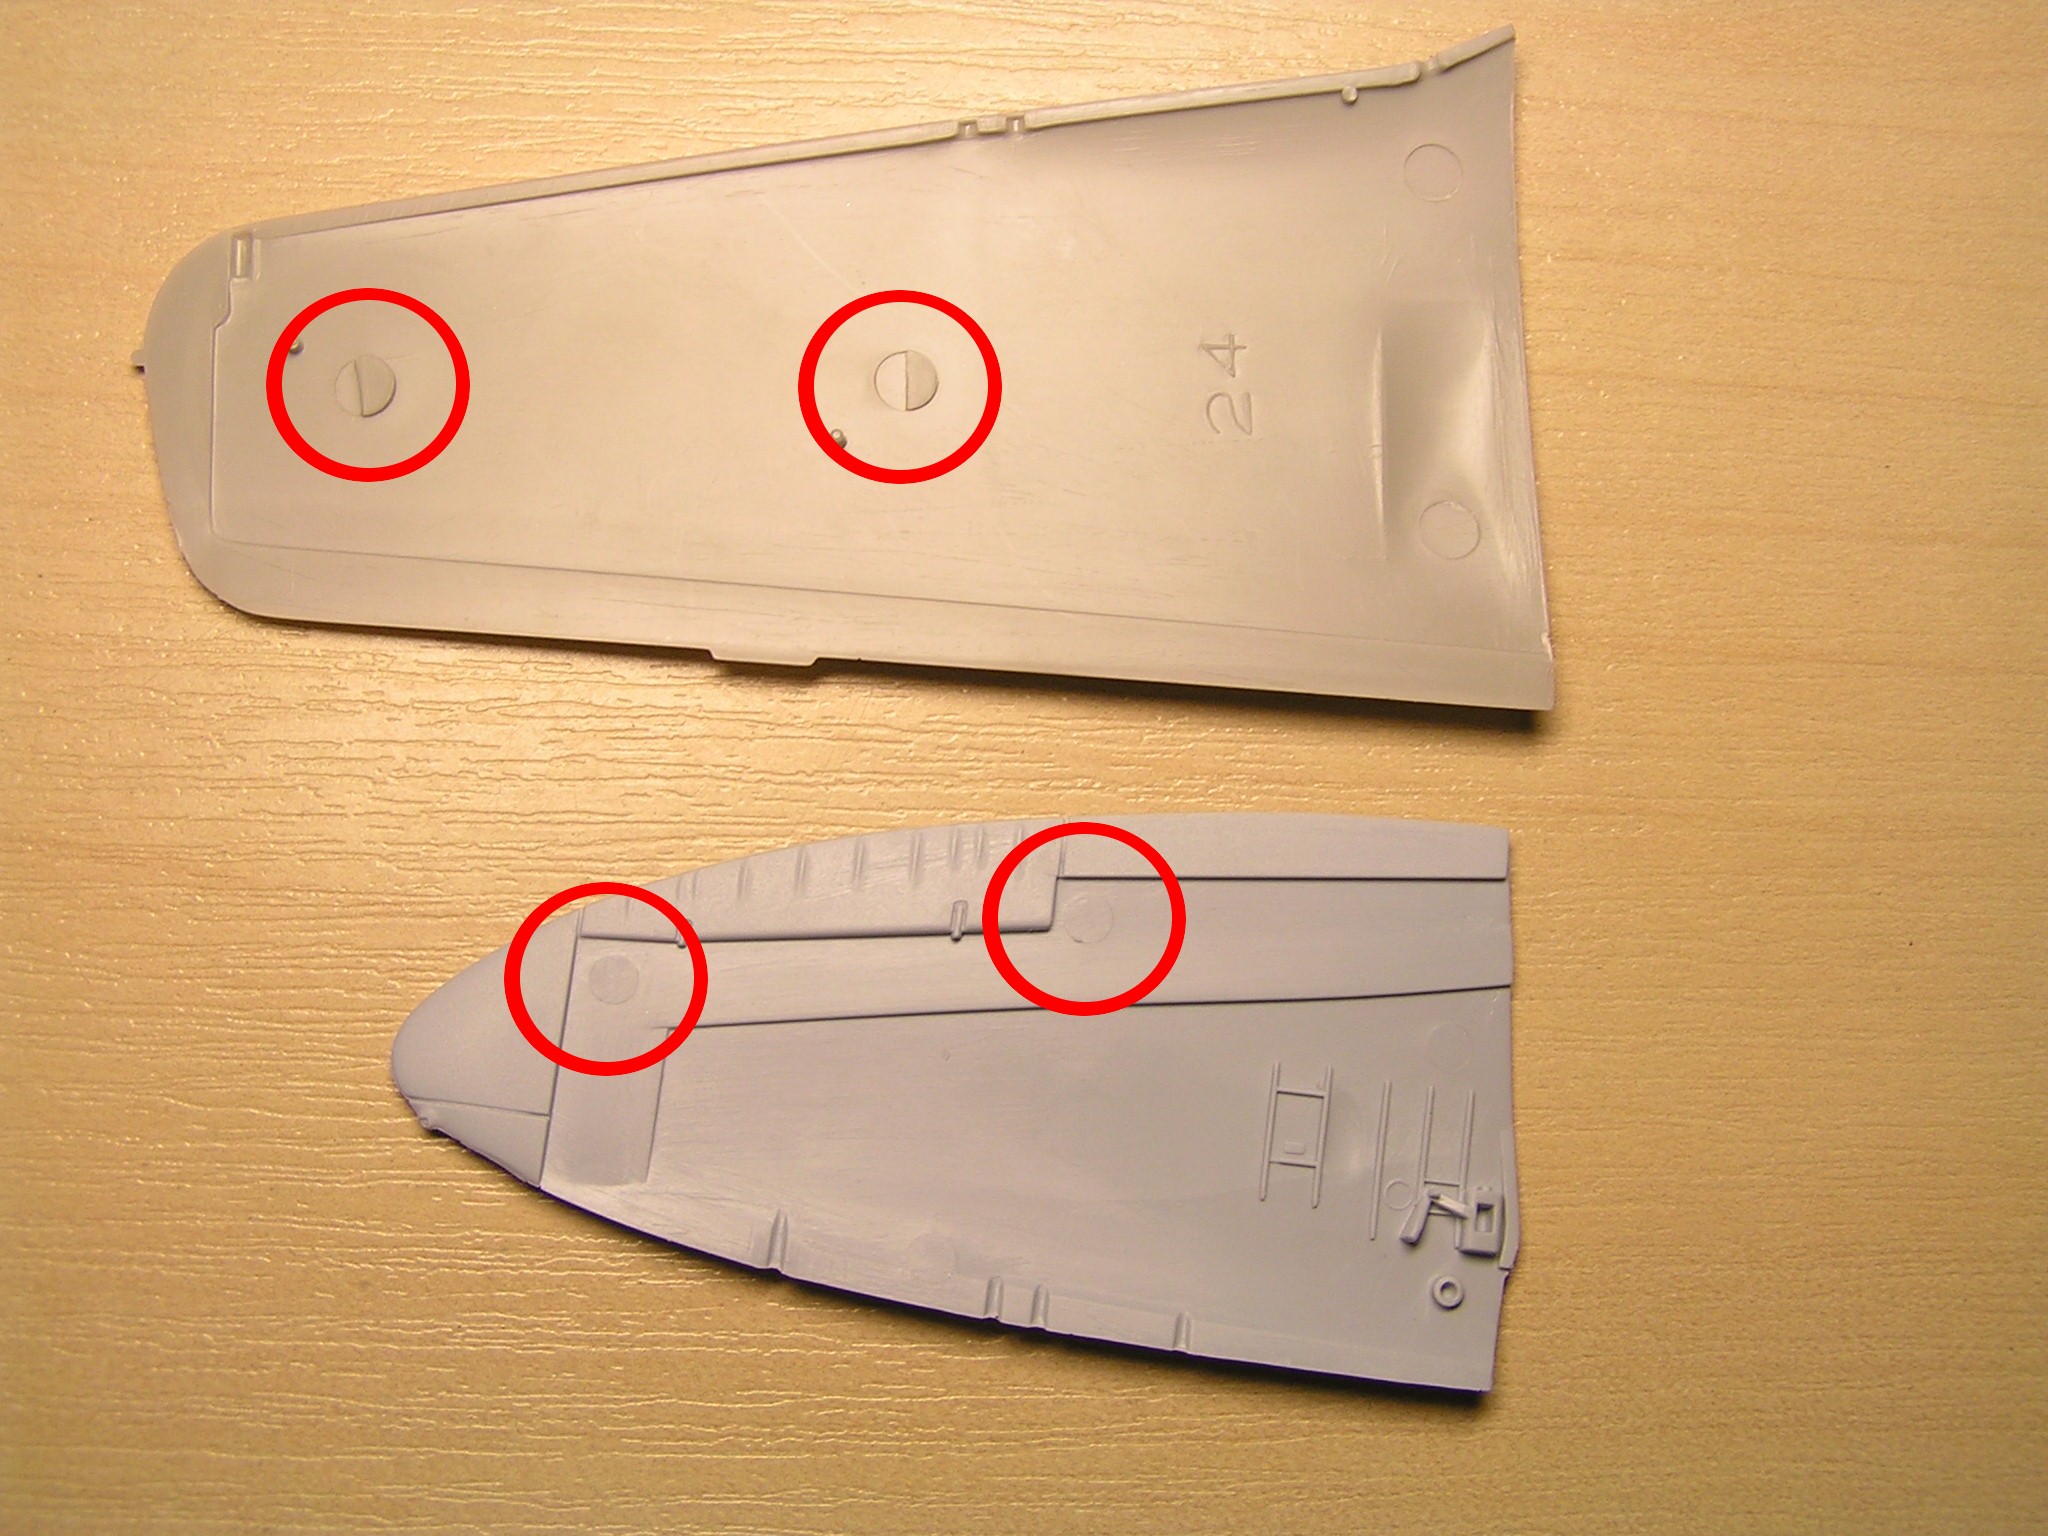
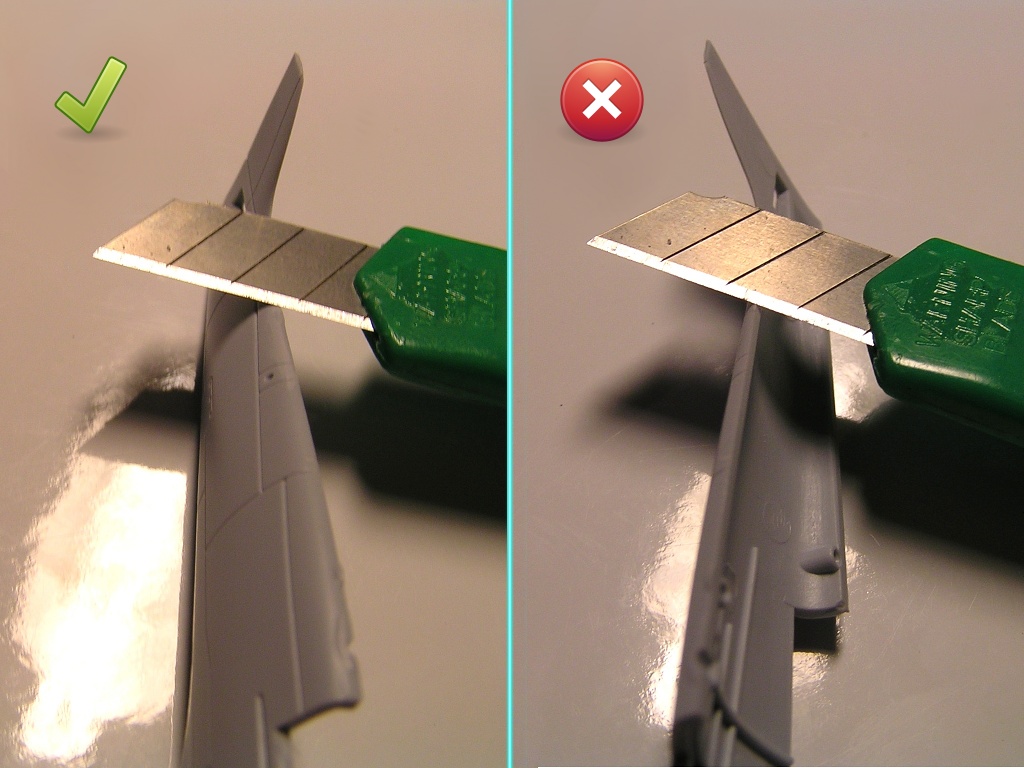
Removing protrusions
When we separate parts from the molding tree, we need to smooth them a little. Usually, there are the residues of the casting kit - air ducts and imprints of joints used in mold. We sand the residues with a sandpaper or we scrap them with the edge of the knife. It is important to maintain the correct position of the blade during scraping to preserve proper edges of the model. Using knife in improper angle could create unsightly depressions. However, if there are already some depressions included in the kit, we can fill them with putty and sand down afterwards.
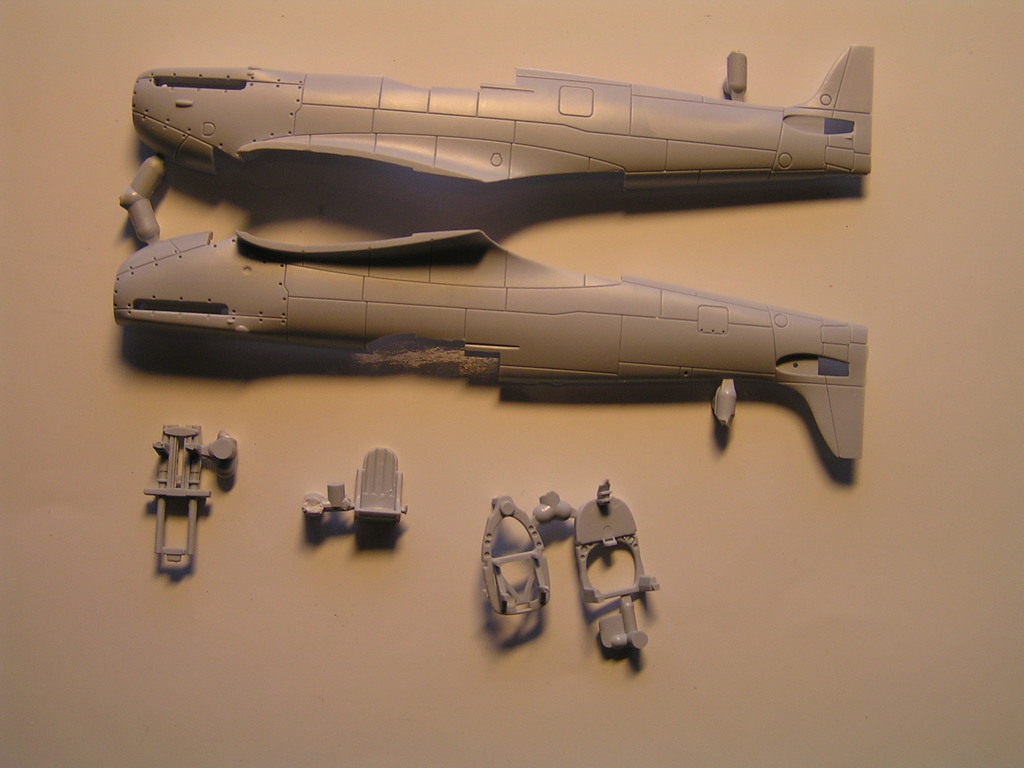
Before assembling the individual pieces together, it is a good idea to try in draft, how parts fit together, and find out where the glue has to be applied. Not always it can be all right. Especially the cheaper kits can contain parts which fit into each other with difficulties.
Shaken and stirred
First, we should paint individual parts of the cabin, because we could have some difficulties with painting hard to reach places after assembling the cockpit and placing it in the fuselage.
 Shake the closed paint can several times. Then open it and stir the paint with a stick.
Pick up small amount of paint with a stick and put it somewhere
else, e.g. bottle cap. I prefer using yogurt plastic cups, lying upside down.
For brush painting, the paint should already be in proper consistency,
therefore thinning is not usually needed. If you consider the paint too dense,
usually when it is a little older, you can gently dilute it. Dilute only the
quantity that you need for immediate painting.
Shake the closed paint can several times. Then open it and stir the paint with a stick.
Pick up small amount of paint with a stick and put it somewhere
else, e.g. bottle cap. I prefer using yogurt plastic cups, lying upside down.
For brush painting, the paint should already be in proper consistency,
therefore thinning is not usually needed. If you consider the paint too dense,
usually when it is a little older, you can gently dilute it. Dilute only the
quantity that you need for immediate painting.
Painting the cockpit
We will paint cockpit interior with paints specified in the instructions. If they are not listed in the manual then you can look for some photos, which can be found on the Internet or in specialized publications.
Cockpit of Spitfire is painted in "cockpit green" or "interior green", such as paint Tamyia XF-71. I used an olive color, and I added little yellow and white. Do not try to paint the surface perfectly with only one layer. Apply only a thin layer, and after thorough drying (approximately 4 hours), apply a second layer. There should be no gray plastic visible any longer.
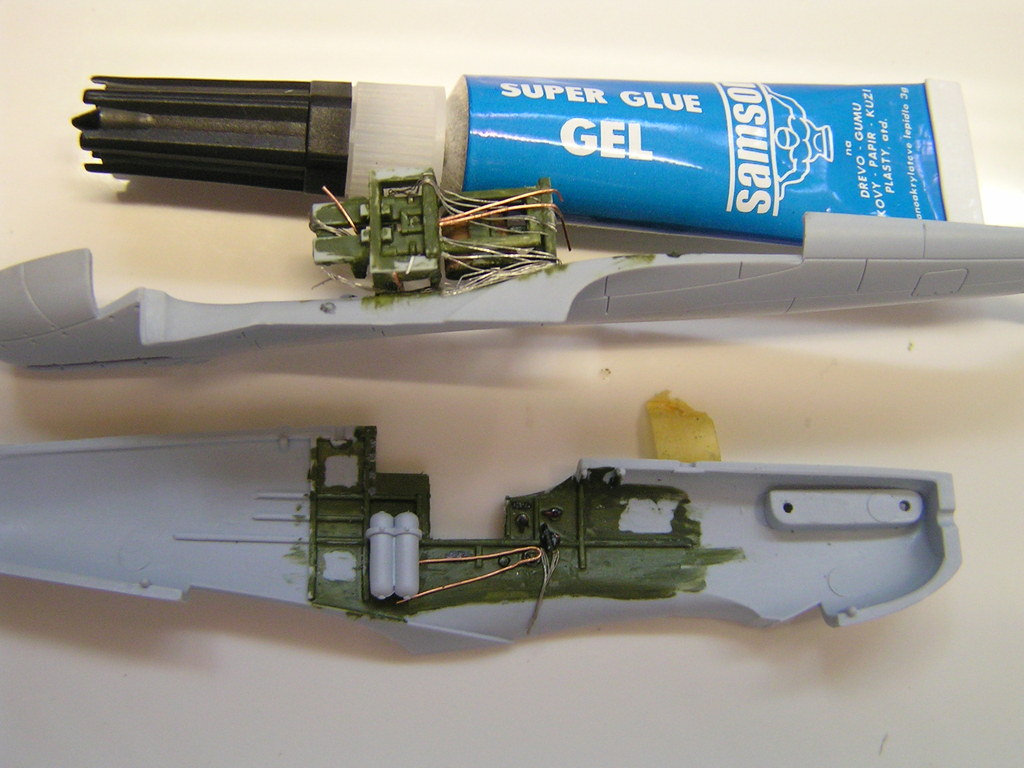
Gluing parts together
Areas of parts to which the adhesive will be applied, should be cleared of paint. If we do not clean them, they will not stick together very well. Some adhesives are quite runny and they leak quickly from the tube. Therefore, adhesive should be applied to a metal pad first, and then transfer with a toothpick or little stick to the surface of parts that we want to glue together.
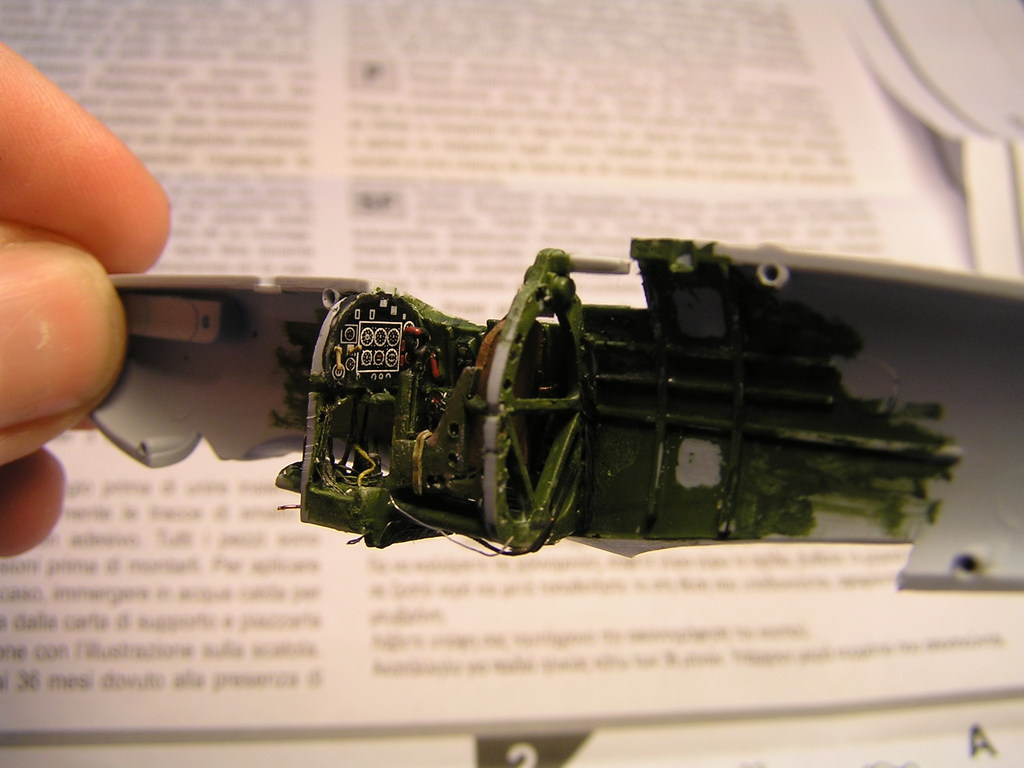
Aircraft dashboard
Creating fine dashboard is simplified thanks to manufacturer of this model, because there is sheet of water-slide decals with a detailed picture of the dashboard within the model kit box. Luckily, we can avoid painting small elements of dashboard, which is quite challenging, because it usually contains a large number of very small gauges, levers and buttons.
Cut out water-slide decal with scissors, and put it in the water for about 10 seconds. Then, transfer it carefully to the surface of the specified part. Detailed instructions on how to work with water-slide decals will be published in one of the following parts of this tutorial.


Small details and accessories in the cockpit
If you really want to have the model as realistic as possible, then you can create your own accessories, e.g. seat belts and various hoses. The tubing can be made easily from wires of different diameters. Use superglue for attaching these little accessories to the plastic parts of the model. Seat belts can be produced from aluminum soda cans. Cut aluminum sheet, shape it, and attach it to the seat with superglue.
What comes next
In the next part, we will assemble the fuselage and wings. I will tell you a little about the correct model geometry and riveting.
Comments

Děkuji.
(každý výrobce modelů udává své oblíbené barvy). Plus pak znamená, že je máš smíchat abys dostal správný odstín.
Děkuji.
pokud máš syntetické barvy, tak musíš štětinky vymáchat v ředidle. Pokud akrylové, tak můžeš použít klasickou vodu, ale po delší době je musíš omýt v ředidle nebo syntetickém lihu. Štětec namoč do ředidla a otři do hadříku. Pokud máš profi štětec s přírodním vlascem, můžeš štětinky omýt v mýdle. Zachováš tak lepší tvar a životnost štětce.
1. pořídit si vrtáčky a dírku provrtat
2. špendlíkem nebo jehlou dírku prorazit, pokud to nepůjde, můžeš je nahřát na svíčkou. Pak to půjde jak po másle.
3. uřezat nebo upilovat výstupky u sedačku a jednoduše je zalepit na správnou pozici bez zvětšování otvorů.
som začiatočník.