Tips and tricks
Plasmo > Tips and Tricks > How to build a plastic model (7) - Final adjustments and weatheringHow to build a plastic model (7)
Final adjustments and weathering

Difficulty: 
In this last episode of short guide for beginners we will make final adjustments on the model and learn how to add weathering effects. If an aircraft or another machine is actively used, then it will soon start to show signs of wear and tear. When you paint model simply according to included instructions, then it will look like a brand new thing that just rolled off the production line. This can be sometimes an intention, but we usually want to add a little weathering effects. I will describe procedures, that will allow model to look better than just a simple toy. It is not advised to hurry with weathering procedures, because you can damage the whole model easily.
Postshading
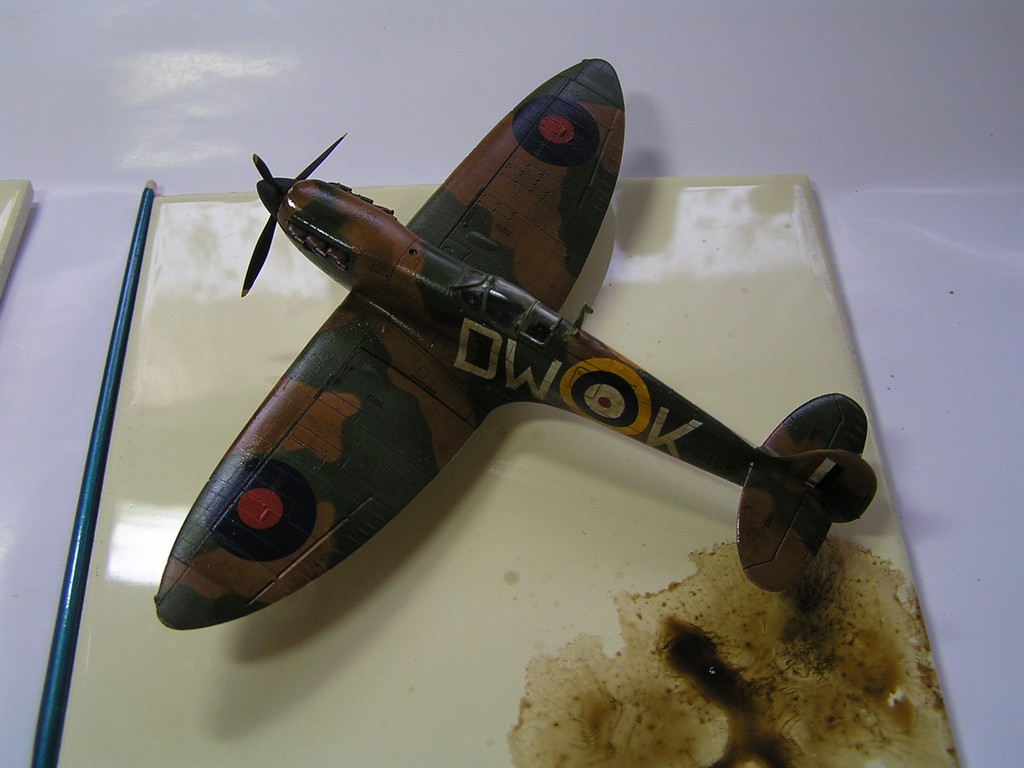
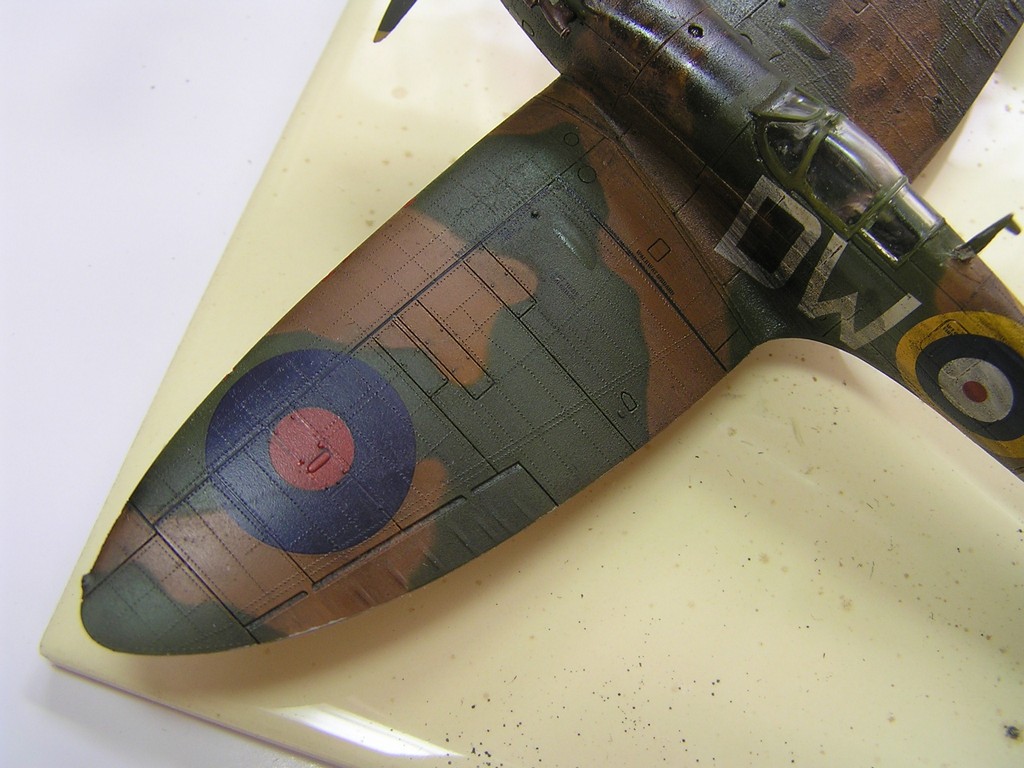
In the fifth part of the instructions I briefly mentioned preshading technique, which allows us to highlight the engravings using dark colors before painting the model. Sometimes, it is not enough and we would like to add additional shading, which will be more pronounced. We can highlight the edges and engravings using another application of very diluted dark paint with an airbrush. It is necessary to pay attention to fine paint dispersion. With this technique we can also paint the places that are supposed to look dirty or smudged by smoke.
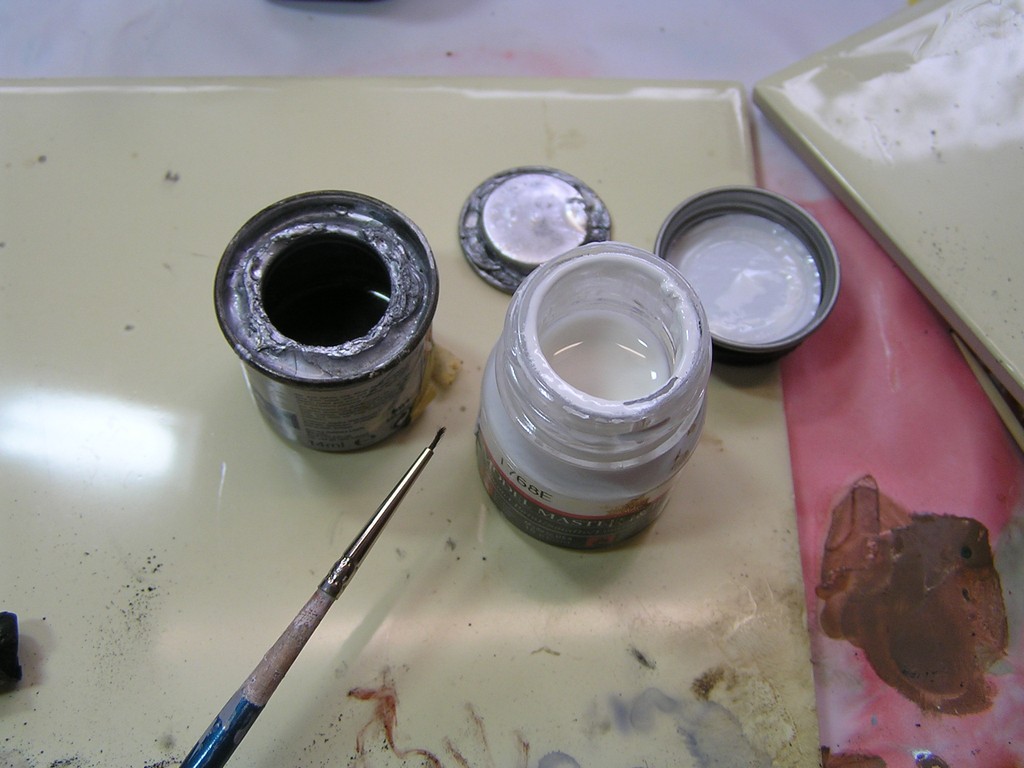
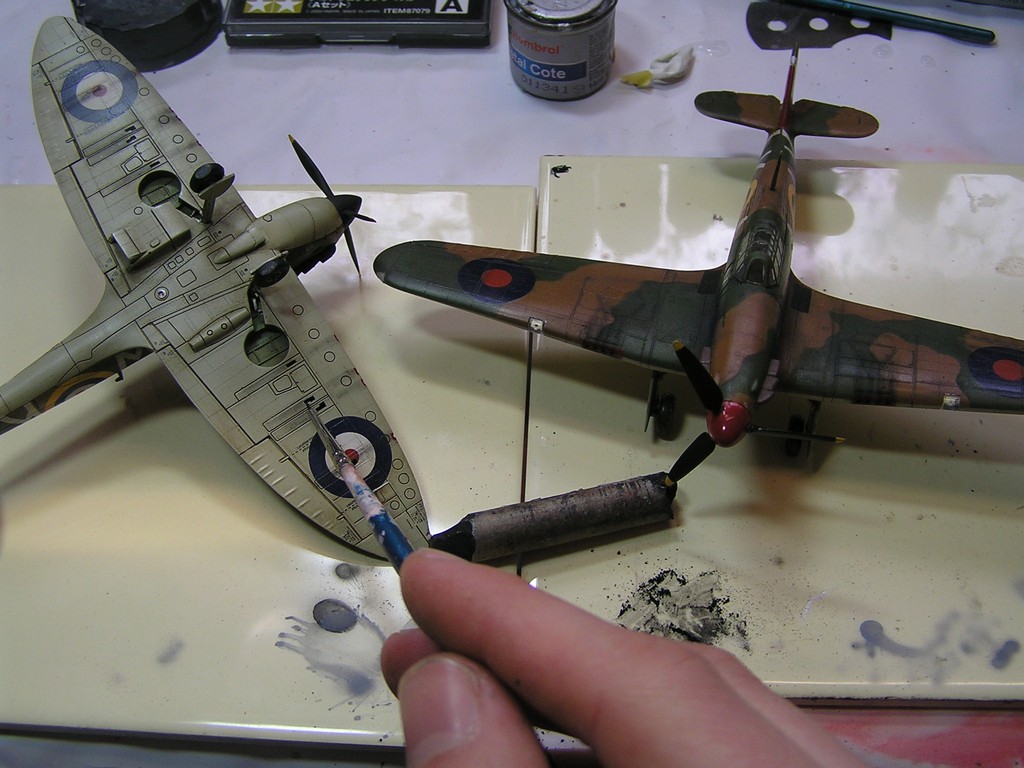
Oil paints and washes
Proper technique of airbrushing can be quite challenging, and as beginners it is possible that you don't have airbrush of good quality or you don't have airbrush at all. However, it is also possible to use oil paints for highlighting engravings. Actually, it is my preferred technique.
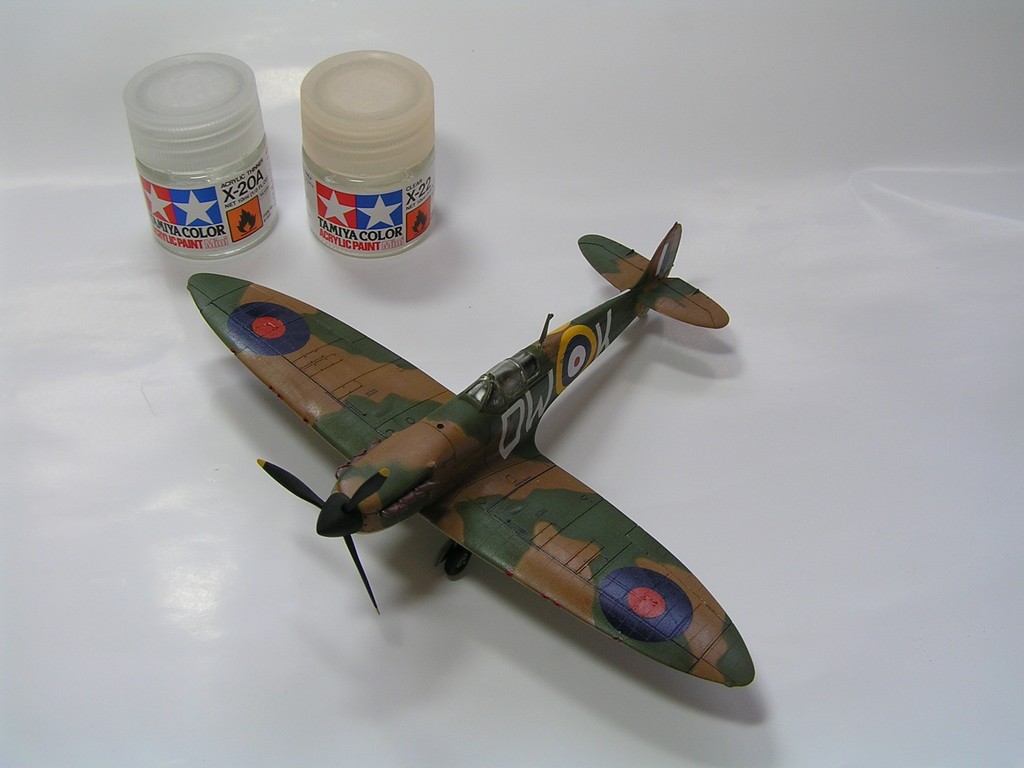
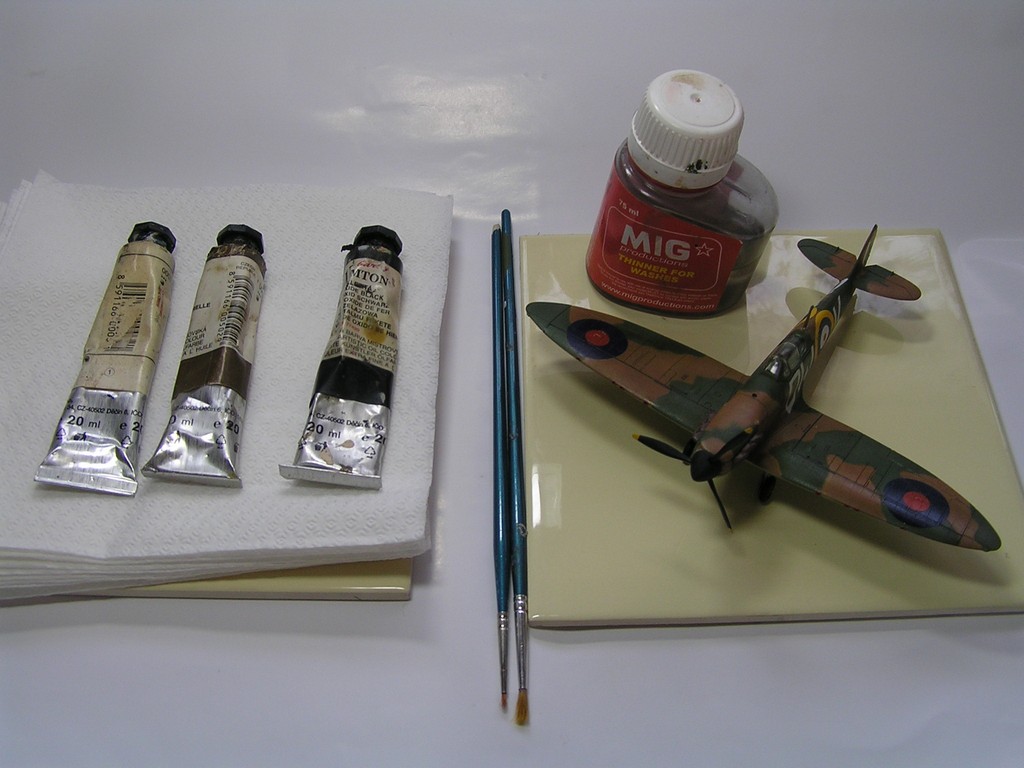
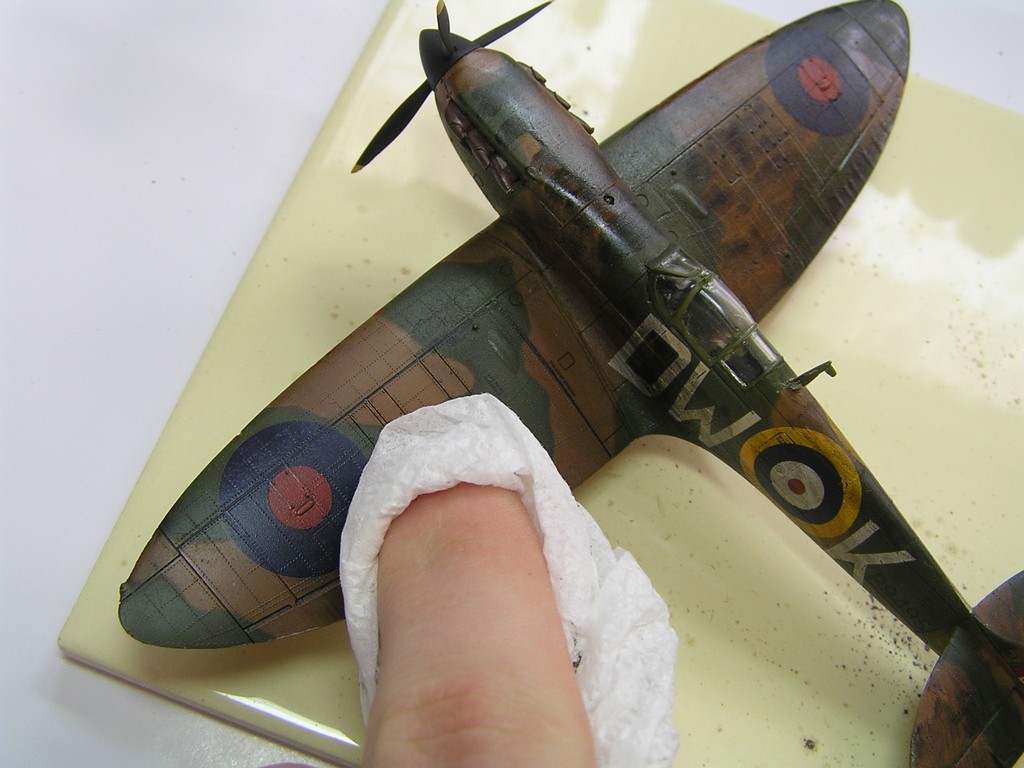
First, before we apply oils, we have to properly spray model with a gloss varnish once or twice. When using synthetic paints, it is always necessary to spray model surface with an acrylic varnish, otherwise we risk that surface will be corroded or we wipe off already applied paint. On such a prepared surface we can apply oil paints. Personally, I use Umton paints. Paints must be very thin, and therefore they must be diluted properly. For this purpose I use Mig Production thinner called Thinner for Washes or thinner Windsor & Newton.
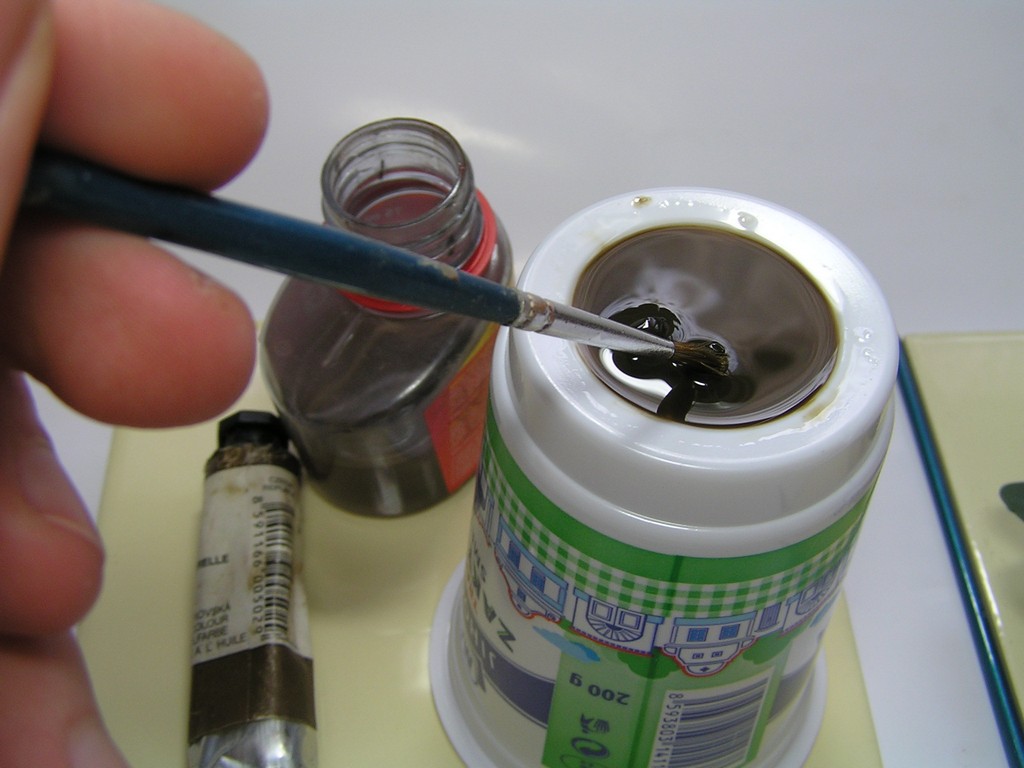
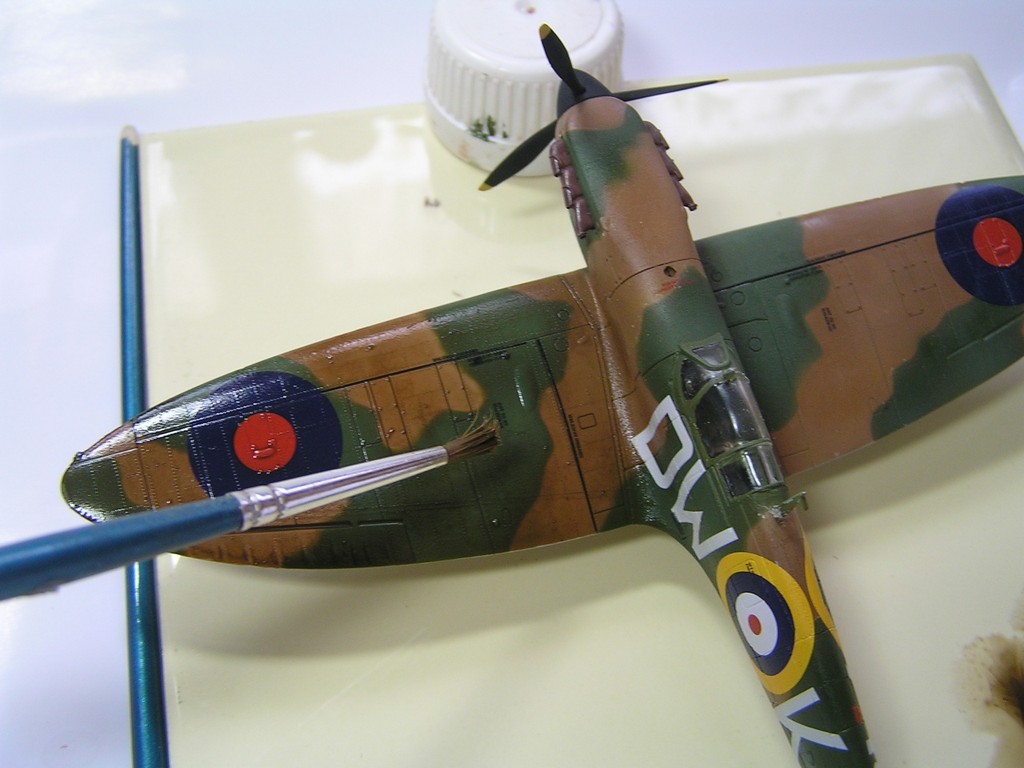
You start by putting a little oil paint into the small pot and adding thinner. Mix thoroughly, until the diluent is stained by a paint. Put a brush to the diluted paint and allow it to soak in, then transfer it to the chinks on model surface. Oil should spread itself along the chinks. If the oil gets to places where we do not want it, we can simply wipe it off with a piece of cloth. If we want model to be dirtier, we can brush the paint across the whole surface with a flat brush. Afterwards we gently wipe it off with a cloth. Hue of oils should be slightly darker than the color of camouflage. When we are finished, we let the oil dry thoroughly, even a few days. After proper drying we can airbrush the model with matte or semi-gloss varnish. Then oils won't be so glossy and look of model will be more pronounced.

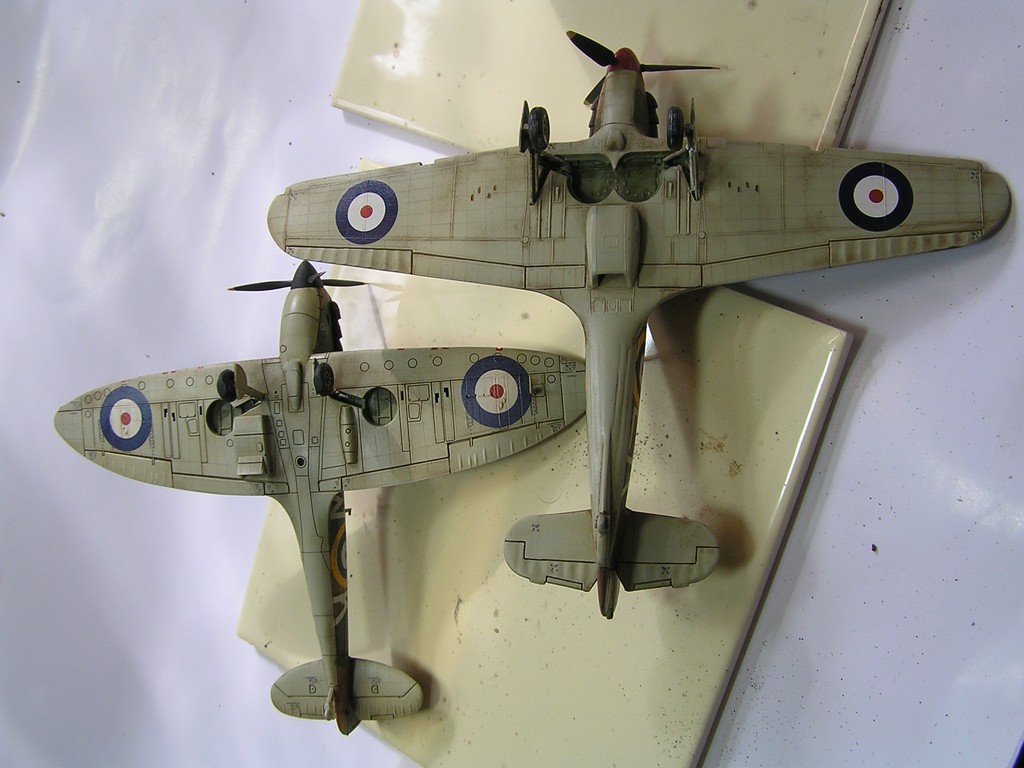
Drybrushing
When we want to represent dirt at the edges or raised parts of the model, we can use besides airbrushing also another technique, where we paint with almost dry paint. It is advisable to use a lower quality or no longer used flat brush, because this technique is more damaging to the brush than usual. Put brush gently into the paint, which can be a bit thicker, and then wipe it in a cloth or absorbent paper. You can also try to make few strokes here and there with the brush to make sure that the paint leaves only subtle traces on the paper. Strokes should be almost unnoticeable. Subsequently, gently paint desired location with several strokes back and forth.
Scrapes and scratches
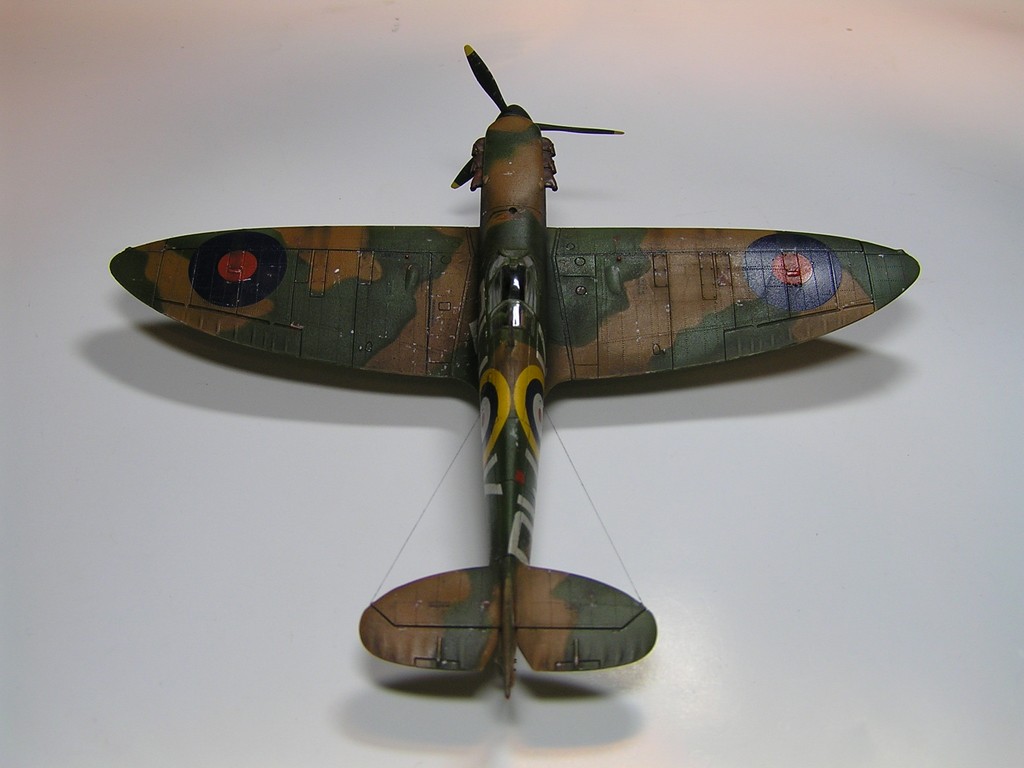
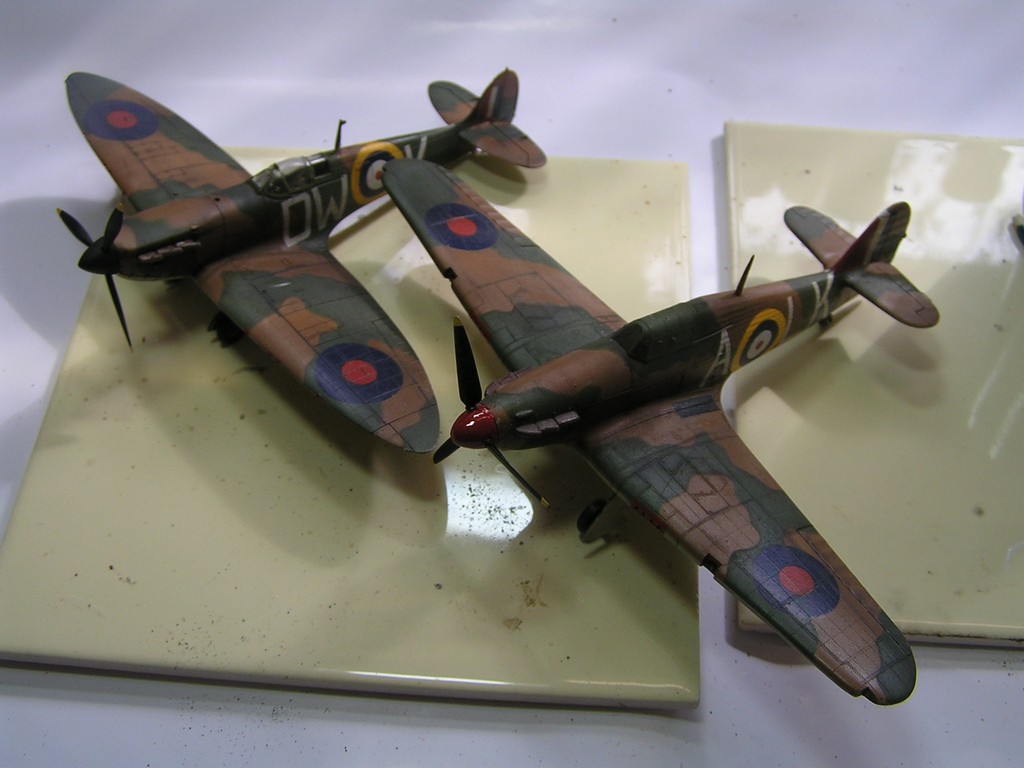
We can use metallic color to highlight scratches. I often use combination of silver color with a little white. Paint the edges of the propeller, the leading edges of the wings, but also places which can be stepped upon by the pilot. It is necessary to apply paint carefully and not overdo it too much. Apply only a rather small amount of paint, usually only from the very tip of the brush.
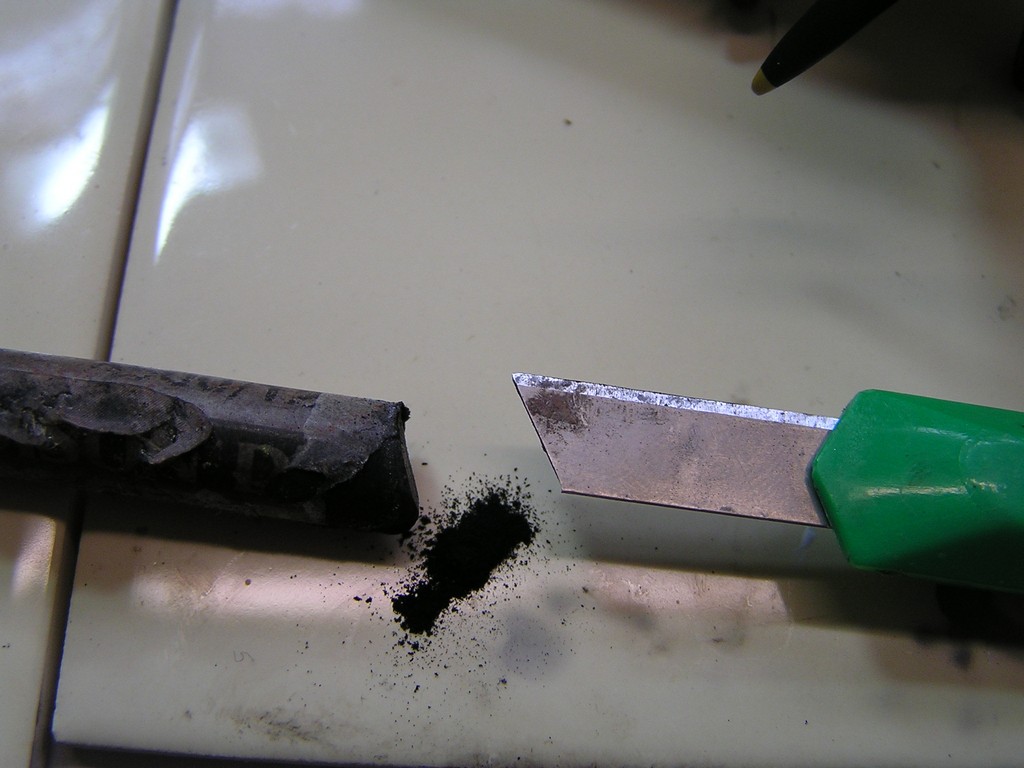
Pigments
We can use crushed dry pastels and also original powders, for example from Mig Production. Pigments can indicate dirty places from exhaust fumes, dirt on the chassis or simply any dirty and dusty place. You will probably not use them much on aircrafts, but they are used a lot when building armored vehicles such as tanks.
Conclusion
Adding weathering effects may not be easy, but it will make your model much better. On the other hand, it is also true that the resulting appearance of model could be gravely damaged, and it could also add you a lot of extra work to fix it, if weathering procedures are not made correctly. It also happened to me that I had to paint the whole model again, because I accidentally damaged camouflage painting. The biggest problem for beginners will probably be to find out proper places where weathering effects can be applied, because usually you will not find this in the manual. Therefore, I recommend you to find photos of real aircrafts in book publications or on the Internet, which will give you at least the basic idea how the model could look like. Finally, photos of finished models from other more experienced hobbyist could be very helpful.
And so, with this final article I finish my short series about building plastic models for beginners. I hope it was at least a little helpful and I wish you a lot of success.
Comments

začal jsem s náročnějšíma technikama barvení a patinování modelů a nedávno jsem narazil na tuto serii videí. http://www.plasticmodelsworld.com/node/925
Tak doporučuji se nechat inspirovat. Hlavně pro fanoušky Warhammer.
mám dotaz, dokončuji svůj první model (Mikuma od Tamiya) a chci to stříknout lakem. Mám matný Mr. Color 182. Ředí se ještě nějak před stříknutím, nebo to je již připravený k aplikaci?
Děkui za radu
Michal
potřebuji poradit taky s tímto Spitfirem. Dneska jsem ho donatíral ( bohužel, natírám všechny modely štětcema, na kompresůrek nemám.Aspoň se v tom člověk vyžije ;-) ) Používám jen emailové barvy. Stačí když rytí paneláže vytáhnu obyčejnou tužkou ( tvrdší ) a natřu polomatným lakem, tak abych docílil plastičnosti modelu? Nebo stejným postupem jak máš psaný.
Je od Revella starší výroba.
Díky za radu Tom
Můžu poslat foto na email Spitfire Supermarine, jsem zvědavej na názor
Tak isto pripravenu tekutinu mozete pouzit aj na zaspinenie otvorov (imitacia oleja), vyfuk. plynov a pod.
jaké je ředění k černé barvě (akrylové)
https://www.youtube.com/watch?v=qN11402J0kk
P.S.:super stránky a mnoho inspirace jen tak dál :)
už delší dobu používám akrylové laky od Gunze a Tamiye. Jsou velmi odolné a ředidlo od Migu jde aplikovat bez problému. Na obnovení paneláže používám žiletkovou pilku nebo rydlo od Trumpeteru.

Model umyt mydlovou vodou.
Natrit primo na model stetcem.
Poradne nechat zaschnout.
Pak polomatny akrylovy lak ve spreji (Tamiya treba? ktery konkretne prosim?)
Pak Olejove barvy Umton rozredene Mig Thinner for Washes (kde to kupujes prosim? da se to nahradit necim dostupnejsim?)
Pak znovu polomatny akrylovy lak ve spreji.
Pak nastrouhane pastely (na sucho?)
Nakonec znovu polomatny akrylovy lak ve spreji.
Takto???
Moc moc diky
Potřebuju poradit ohledně laků na akrylove barvy. Jelikož na akrylky přecházim, mám použít syntetický lak, nebo akrylový. Patinu chci dělat patinovacím fixem od Gunze saygo černým fixem a pak zalakovat polomatným lakem.Díky za radu
PS: Úžasný stránky!